Getting Started with JPPacks
Summary
Introduction
In this tutorial, you will learn how to use the packs you can find on this site, from the very first step to the final one. At the end of this page, you will be ready to start coding using packs.
What is a pack? You already know it. When you export your game, ShiVa creates a .stk file which contains all the resources your game need to be executed: This is a pack, a container of files. It can contain any ShiVa resources: game, model, scene, scripts, etc. It can contain all of that at the same time, but it can also contain one or other. This is the case of the packs you will find on this site: no game inside, no models. In most cases, they contain only AIModels and scripts.
Each pack comes with 2 files:
- a .stk file: this is the pack itself. It is the only required file to get the pack working.
- a .ste file: it contains a plugin whose unique function is to offer code colorization while you code your game in the ShiVa's Script Editor. Packs can't provide colorization by themself, that's why they all have a dedicated plugin that extends the colorized apis ShiVa Editor is able to display, that's why I often name them lua extension.
Step 1: Setup the JPPackLoader
This step has to be done only once per game. If you've already done it, you can directly jump to Step 2.
Download JPPackLoader
JPPackLoader is an AIModel that will help you load your packs, from a local directory or from a distant path.
JPPackLoader can be downloaded here as a .ste file, that contains the AIModel.
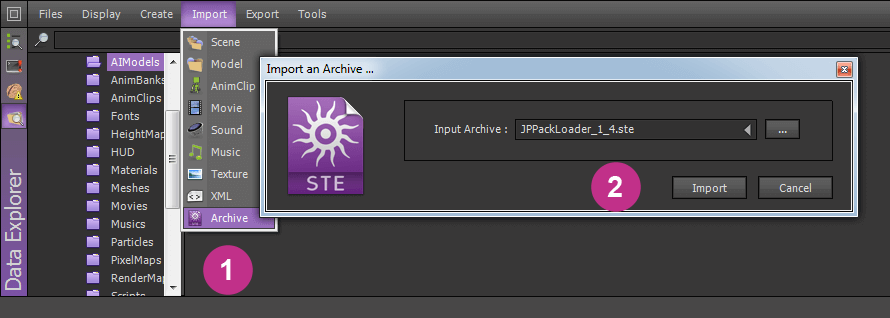
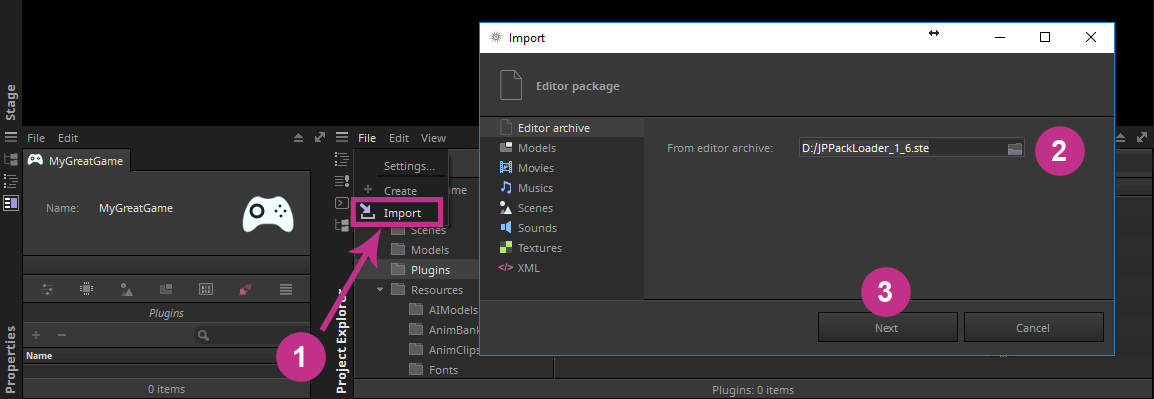
Import the .ste file in your workspace
Once downloaded, use the import feature in the Data ExplorerProject Explorer to import an editor archive. Pick your file from your computer and import it.
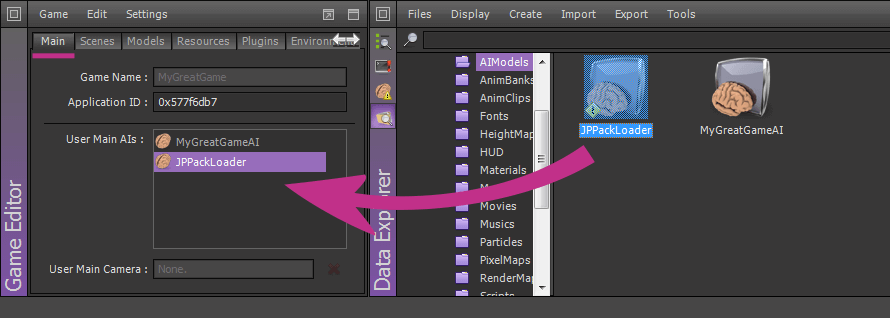
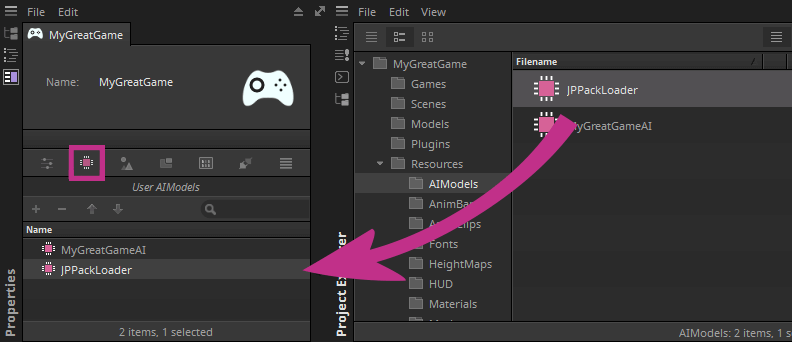
Reference the AIModel into your 'User Main AIs'
A new AIModel is available under the Resources/AIModels folder. Reference it in the User AIModels section of your game:
Load your packs with "onLoadLocalPacks"
JPPackLoader is ready to be used. The only thing to do is to ask JPPackloader to load your local packs. This can be done with one single line, as follows:
function MyGreatGameAI.onInit ( )


user.sendEventImmediate ( application.getCurrentUser ( ), "JPPackLoader", "onLoadLocalPacks" )


end
Your packs have been loaded into memory and are ready to use.
Step 2: Adding a pack to your game
Download the pack file and its plugin
As I said in introduction, each pack comes with 2 files: the pack itself and a plugin to colorize the API of the pack. Start by downloading these 2 files for the pack you want to add to your game.
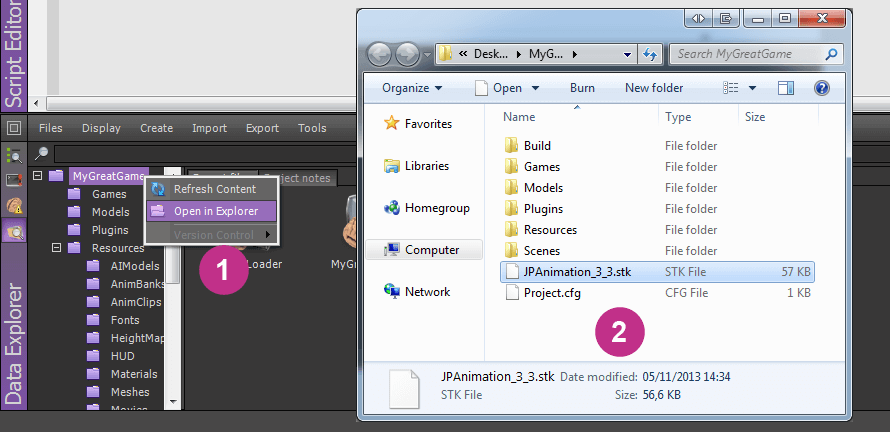
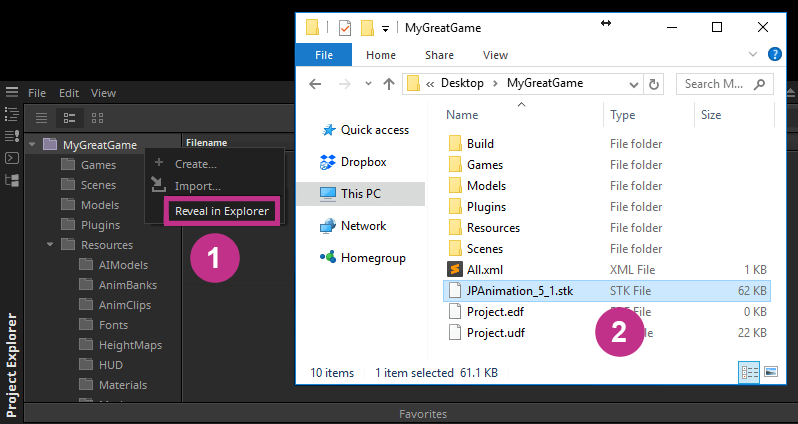
Copy the pack file in your project's root directory
Now, the first thing to do is to place the pack (the .stk file) in your project's root directory:
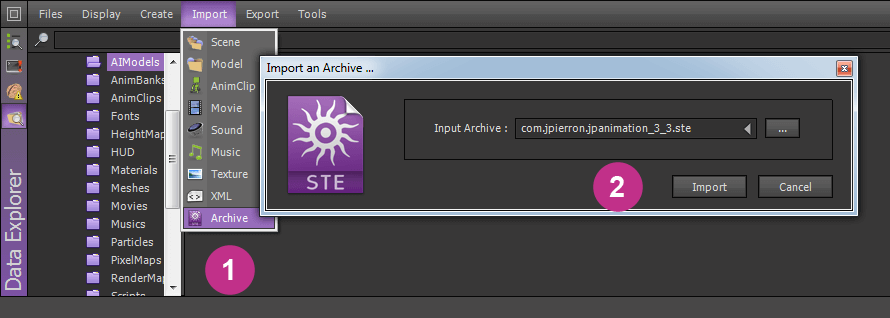
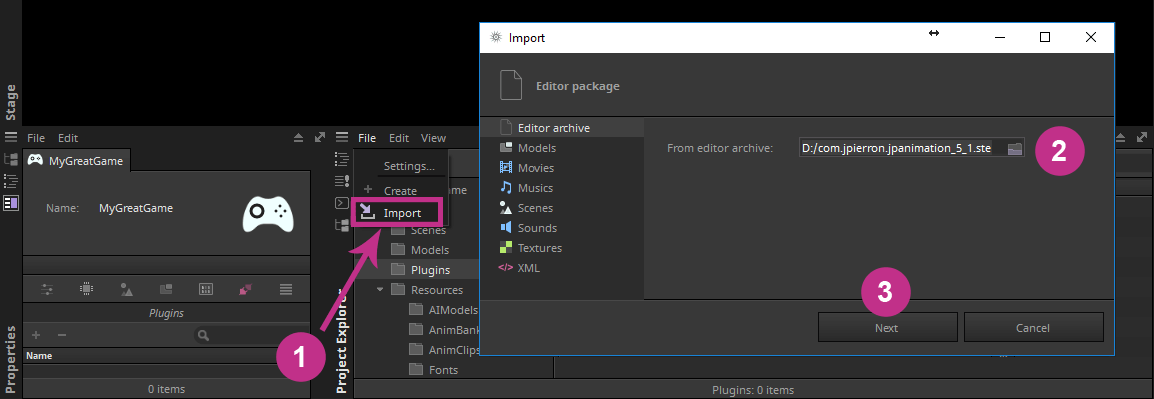
Import the plugin into your workspace
Then, import the plugin (.ste) in your project by using the archive import feature in the Data ExplorerProject Explorer:
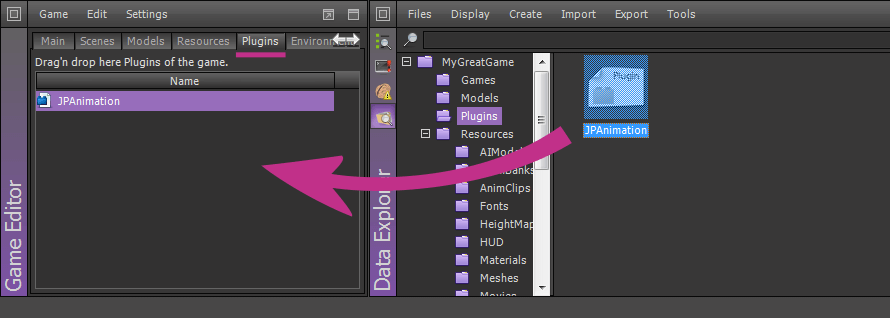
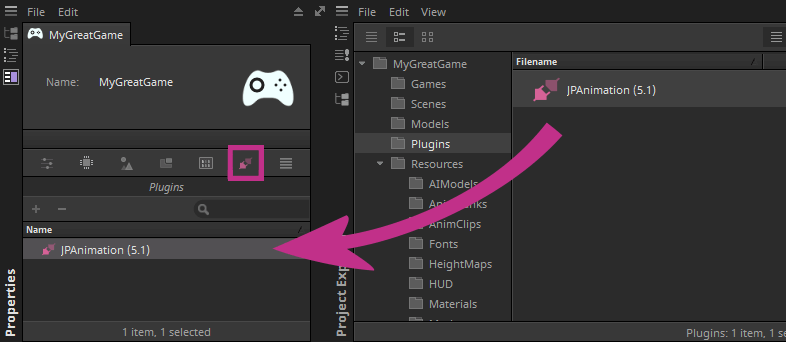
Reference the plugin into your game
The plugin now appears under the 'Plugins' folder, and you have to reference it in your game: drag'n'drop the plugin from the Data ExplorerProject Explorer to your game's plugin tab:
Activate your pack
Free packs do not need to be activated and can be used directly.
Paid packs require to be activated. Use the following function by replacing 'PackName' by the real name of the pack you want to activate: PackName.activate ( sUserToken, sActivationCode )
The activation is a security check done locally when the game starts, there's no communication with any server. The packs will work even if the end user does not have any internet connection.
function MyGreatGameAI.onInit ( )


  user.sendEventImmediate ( application.getCurrentUser ( ), "JPPackLoader", "onLoadLocalPacks" )

  JPAnimation.activate ( "[user_token]", "[activation_code]" )


end
As you can see, you can call your pack's functions next to the onLoadLocalPack call because local packs are loaded immediately.
As the packs can be freely tested in ShiVa Editor, you can leave the user token and activation code empty until you decide to use them on the target device. In that case, you need a valid activation code or the packs won't start. When you decide to purchase the pack, an account is created on the site and you can access to your codes.
You can request activation codes on the dedicated activation page. You will be first asked to log in. The email is the one you used with PayPal for your purchase. When you've purchased a product for the first time, you have received an email to set your password. This password is the one of your account (if you haven't changed it until now). You now know how to access to the activation page (or any page related to your account).
You will then be asked to enter a game name. Activation codes are unique for each game. The game name is the filename of your opened game. You can also find it in the properties of your game.
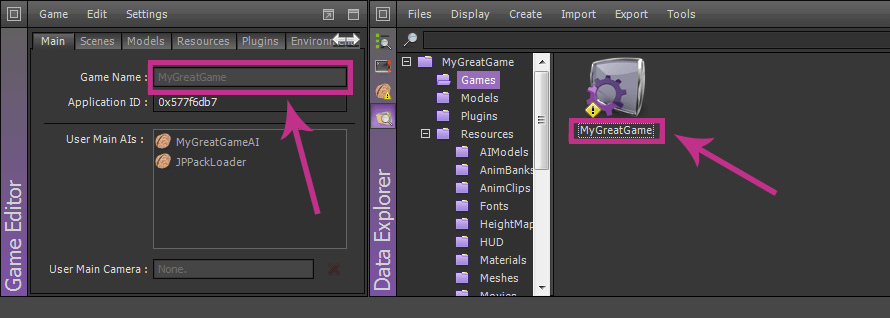
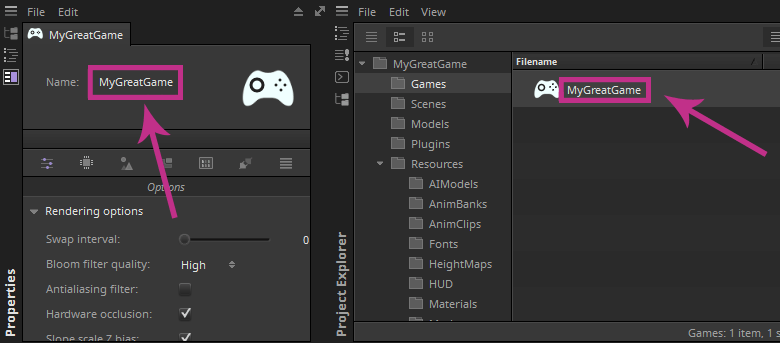
Please note we are talking about the ShiVa game name. Do not try with the final name of your application because it may be different and your activation codes won't work. In case you decide to rename your ShiVa game name, please generate new codes that match the new game name.
You are done with the setup phase of your pack, you can start using its great features. If you want to add a new pack to your game, just repeat Step 2. Your pack will automatically load as you already call the JPPackLoader onLoadLocalPacks handler.
Step 3: Publish your game and your packs
Reference your packs into the 'Additional Files'
When you will publish your game, the packs won't be automatically added in your final game. There's one additional small step to do : you just need to reference the pack in the 'Additional files', as you can see below:
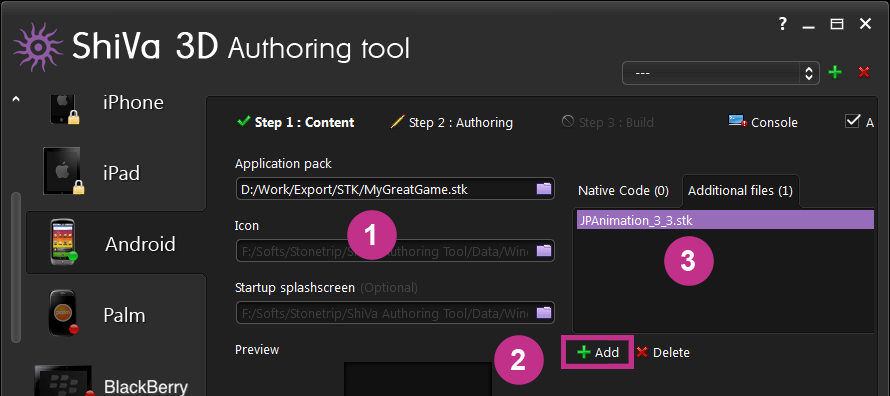
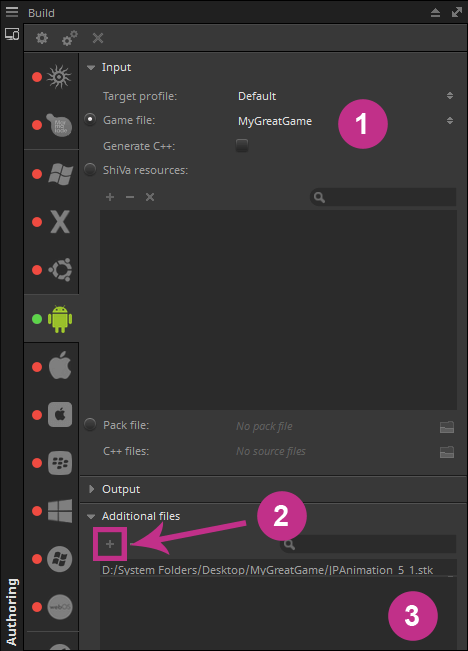
Setup the rest of your application and build it. It should work like a charm! If you have several packs, add them all into the 'Additional Files' too.